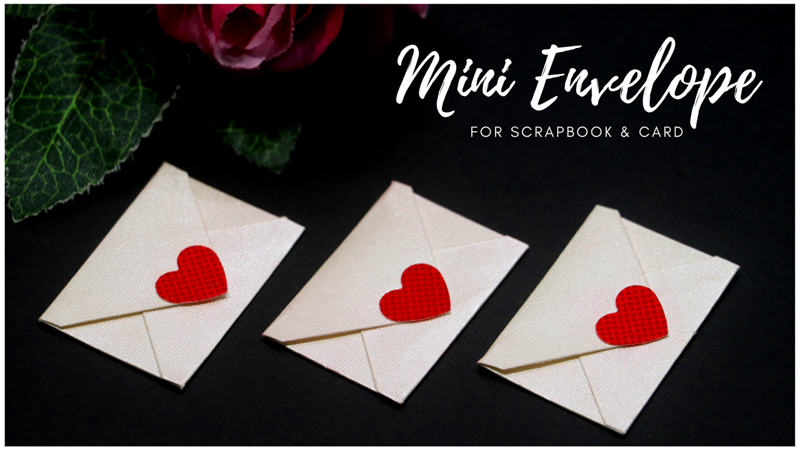
Super cute mini envelope making tutorial for scrapbook, explosion box or greeting card. These envelopes are made using cardstock using a very simple method with minimal measuring and cutting involved. The envelopes look really amazing and give a new dimension to your handmade greeting cards and scrapbooks etc.
So, let’s get started.
Materials Required:
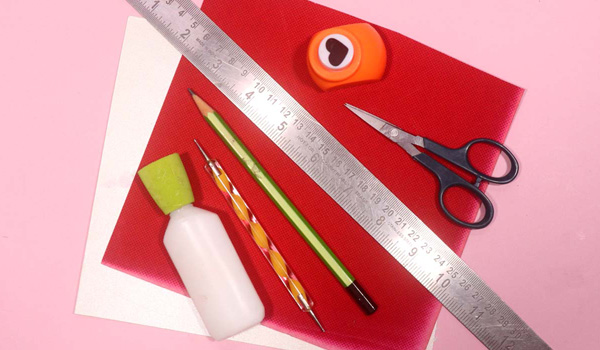
- Cardstock
- Ruler
- Pencil
- Scoring Tool
- Scissors
- Glue
- Craft Punch
Instructions:
Watch video tutorial for Mini Envelope
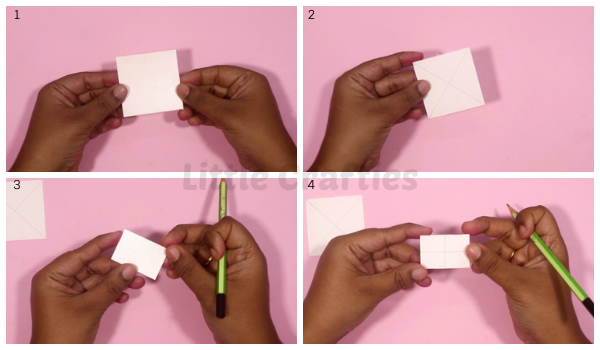
- Cut out a piece of cardstock of size 6 cm * 6 cm.
- Draw the diagonal lines on this cardstock piece.
- Cut out another piece of cardstock of size 4.4 cm * 4.4 cm.
- Make lines through the middle to divide it into 4 equal quarters as shown.
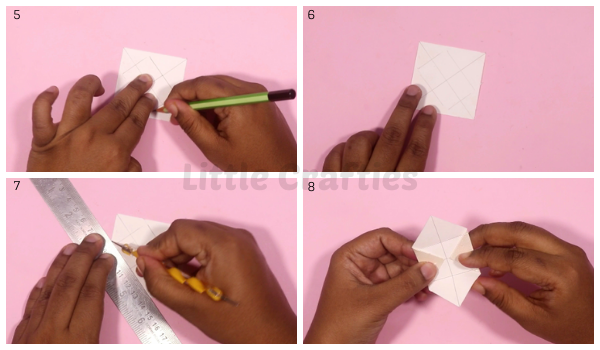
- Put the smaller piece on top of the bigger piece and align the centre point and lines drawn.
- Trace the outline of the smaller piece on the bigger piece of cardstock.
- Use a scoring tool to crease the outline as shown.
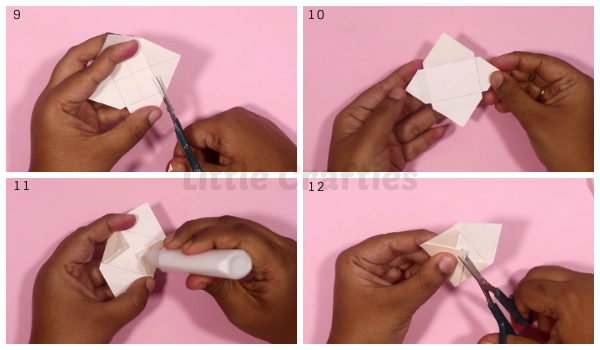
- Fold the creases made to give shape of the envelope.
- Cut out the excess paper from the corner of the crease.
- Apply glue and paste the folds to make an envelope.
- Cut out the excess part from the top of the mini envelope.
- Use craft punch to cut out a heart.
- Paste the paper heart on the top flap of the mini envelope.
- Insert the smaller piece of the cardstock as a mini card.
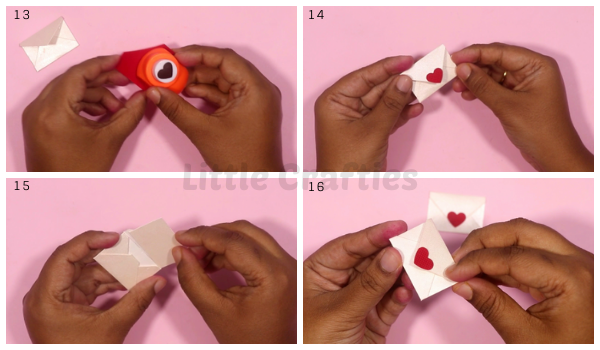
So, here is our cute mini envelope ready to be used in greeting cards, scrapbooks and explosion boxes. Wasn’t it easy to make and don’t they look amazing? Although we have decorated the envelopes using paper hearts, apt for Valentine’s day, you can decorate and design the mini envelope as per your imagination and requirement. You can use hand cut shapes, stickers, rhinestones or any other element you like, and we are sure that it will look equally beautiful.

