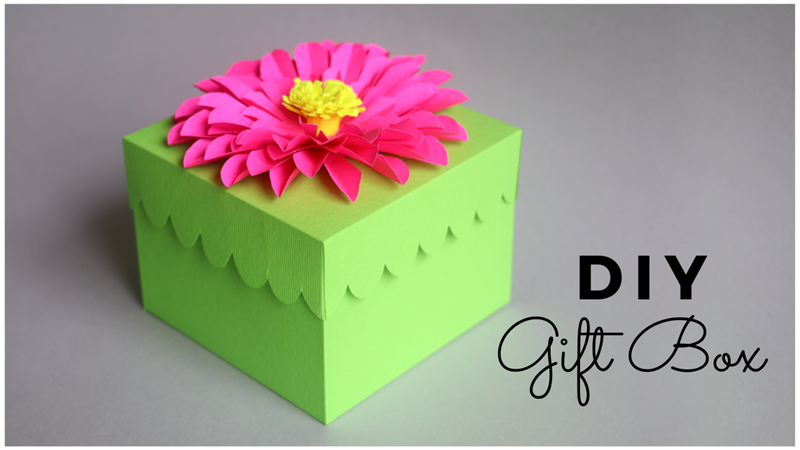
DIY gift box craft idea that is not only beautiful but exceptionally easy to make. You can make this gift box by using our free gift box template that we will show you how to create step by step. The paper box can be customized as many times and in as many sizes as you want by replicating the steps that we have followed to make this amazing handmade gift box. This paper box is great for gifting purpose as DIY gifts or as favor boxes and return gift. You can also use this beautiful paper flower gift box to hold some of your small items like jewelry, chocolates etc. The paper box design is quite simple and elegant and therefore, very easy to make. And to top it off, the paper flower decoration on the lid gives it a completely different and gorgeous look.
So, let’s get started.
Materials required:
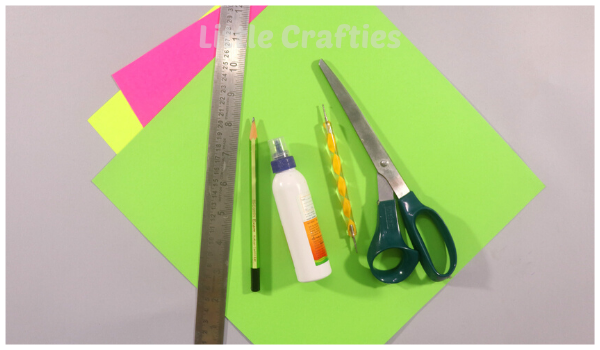
- Cardstock
- Color craft paper
- Ruler
- Pencil
- Scoring tool
- Scissors
- Glue
Instructions:
Watch video tutorial for DIY Gift Box.
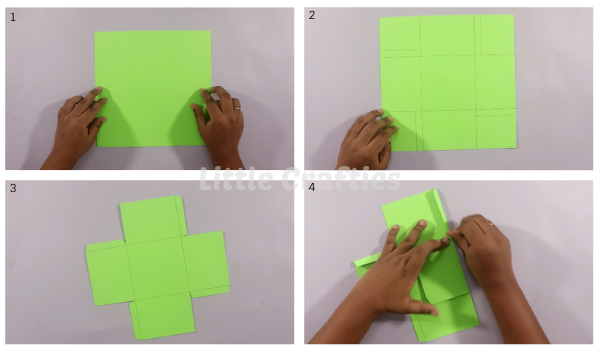
- Take a cardstock of size 26 cm * 26 cm and draw margins, 8cm from the edges of all four sides.
- Draw margins of about 1 cm, each on one side of the rectangles formed, as shown in the picture.
- Now cut out the paper box template as shown in the picture.
- Use a scoring tool to crease the lines drawn on the DIY gift box template.
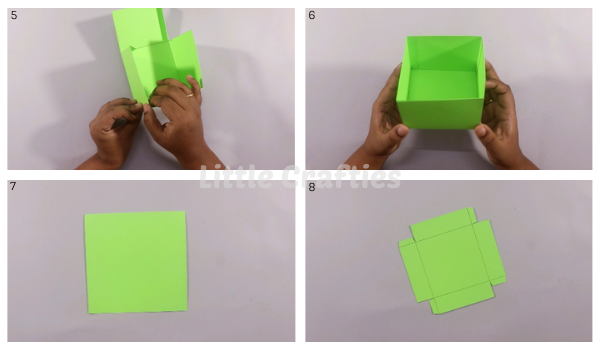
- Now fold the paper box cutout from all four sides along the creases as shown in the picture.
- Use glue to stick the edges of all four sides in order to form a simple paper box.
- To make the lid, take another square cardstock of size 16.2 cm * 16.2 cm and draw margins 3cm from the edges of all four sides.
- Now draw margins of about 1 cm on one side of rectangles formed, similar to step 2.
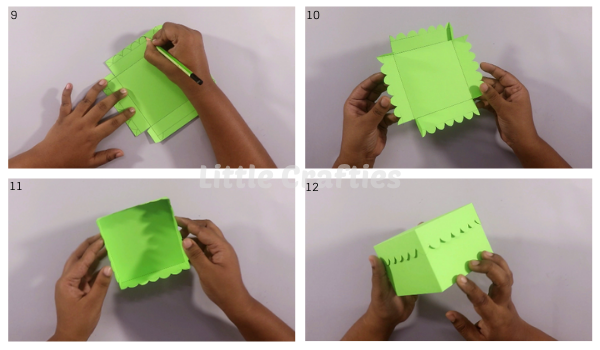
- Cut out the template for the box cover as shown in the picture.
- Draw and cut out fish scale pattern on the edges of all four sides, as shown in the picture.
- Using glue, stick the four sides of the box cover or lid.
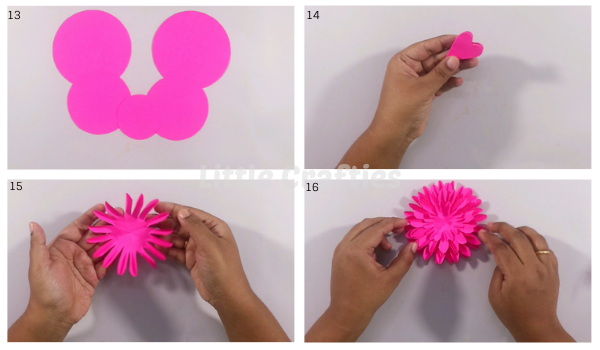
- To make the paper flower for decorating the DIY gift box, draw and cut out circles of radius 6 cm, 5 cm and 3 cm on a color craft paper.
- Fold the circles 3 times and then draw and cutout petals to make simple paper flowers.
- Layer these paper flowers to make a big 3D paper flower.
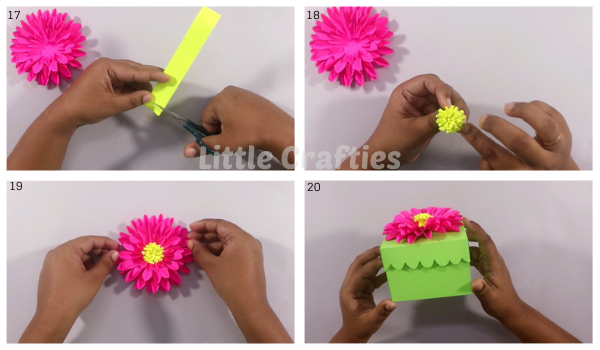
- Now, for adding more details and depth to the flower, make stamens by cutting fringes on a strip of color paper sheet and rolling it.
- Paste the stamen on the center of the flower.
- Now that our paper flower is done, paste it on top of the gift box lid.
And with this we have our beautiful handmade paper gift box. And just as we mentioned earlier, it looks amazing and is really easy to make. All you need to do is, follow the steps above to make the gift box template with lid and use different types of papers like textured paper or patterned paper etc. to make the DIY gift box. You can also create various other decorative designs like butterflies, bows and other types of flowers according to your choice to decorate the paper box. The possibilities are endless with this simple and basic gift box idea. So, do checkout the Little Crafties Youtube channel for more such amazing craft ideas that you can easily make at home.


how long have you been doing this
Crafting for more than 5 years now….loved it as a kid too 🙂
Love this post! I’ve been making craft supplies gifts for some time now and now I’ve got even more ideas! Thank you!!
Thank you so much 🙂